Simple and Delicious Labneh

Simple and Delicious Labneh


If you’ve ever bought and eaten Labneh (Middle Eastern yogurt cream cheese) and like me, thought it was not only incredibly delicious but also incredibly expensive, then you might want to do what I’ve been doing recently and make your own. 

Its unbelievably simple and cheap to make ...

Firstly though, what is Labneh?

In a nutshell, Labneh is a soft, cream cheese made from strained yogurt. Its easy to make and low in calories.

Labneh is healthy, light and delicious and an important source of protein. It is also considered to be a probiotic food, meaning that it is high in a range of healthy bacteria that help to boost your immune system.

Recipe and Instructions  - Depending on how much you want to make -

1 kilo tub or 500gm of greek yogurt 

Good quality Extra-Virgin Olive Oil

2-4 tbs finely chopped fresh herbs and/or  spices such as tarragon, parsley, chives, garlic, chili, ginger or dill

1/2 - 1 teaspoon finely grated lemon zest or a few thin slices

Sea Salt and freshly ground black pepper 

Large Bowl

Large strainer

Muslin, cheese cloth or milk bag

Clean jar

Line a large sieve with muslin and place over a medium deep bowl. Pour yogurt in sieve and gather edges of muslin to cover yogurt. Place in refrigerator and let drain for 2-3 days.

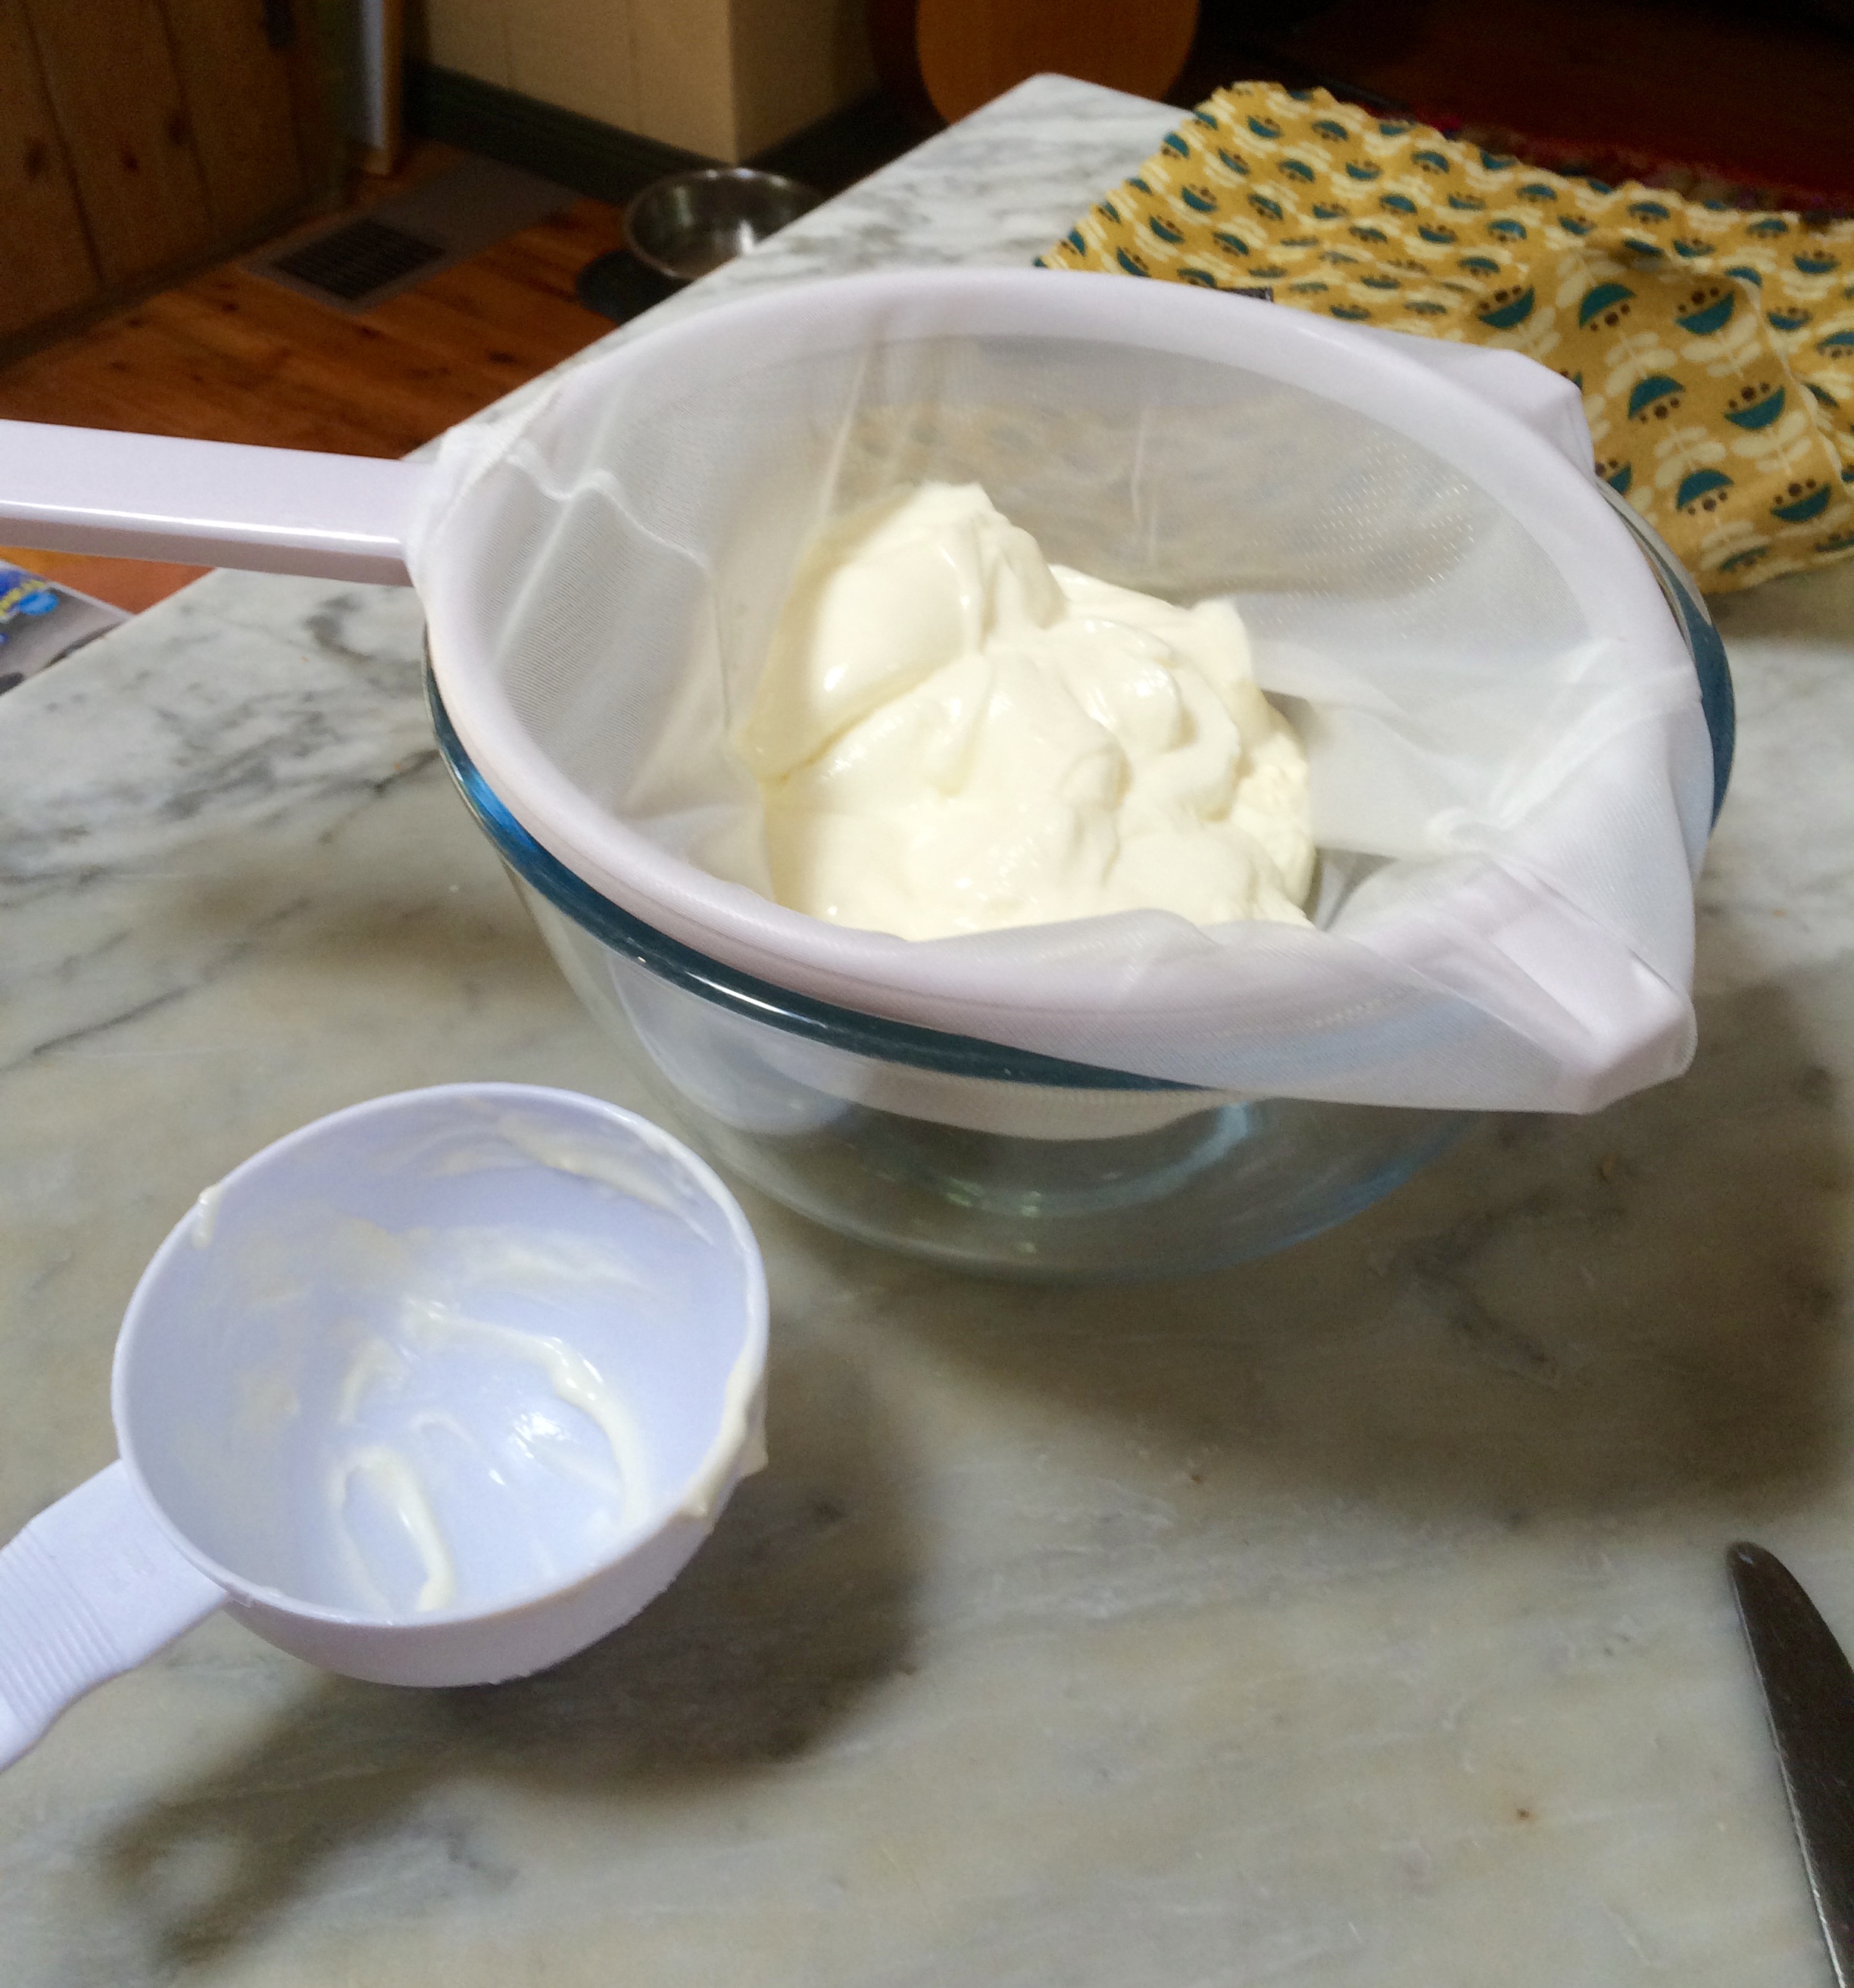
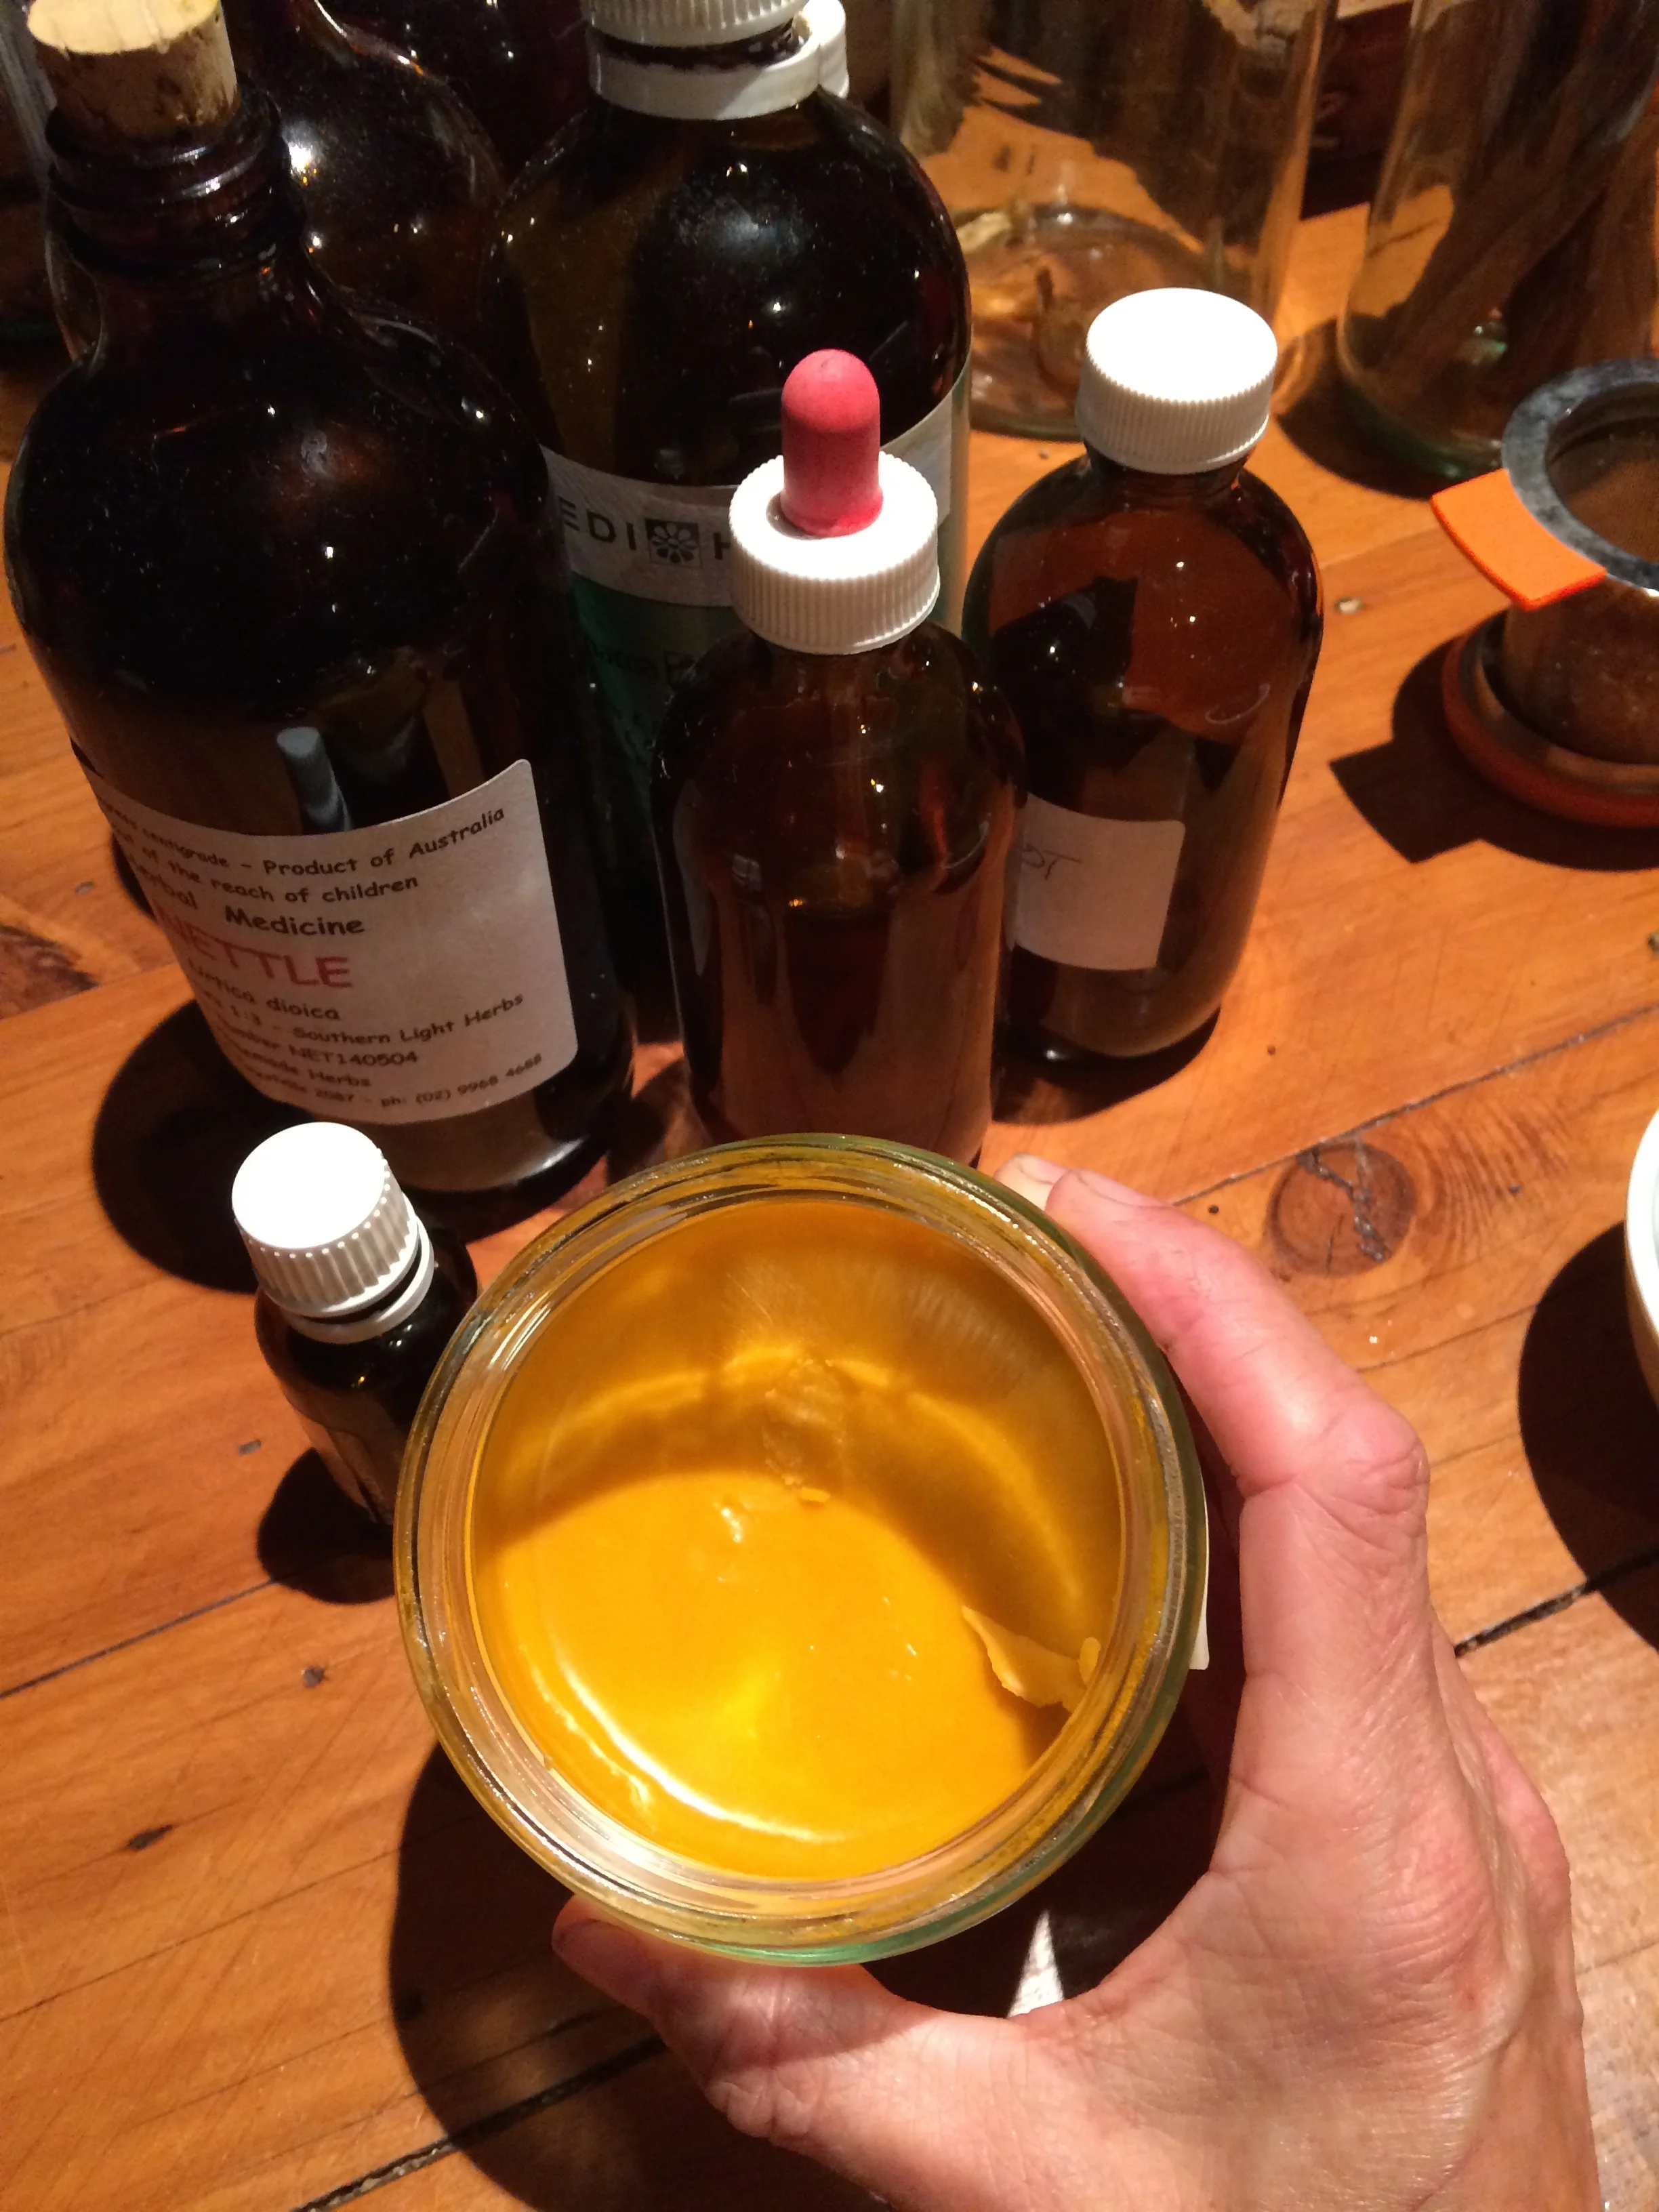
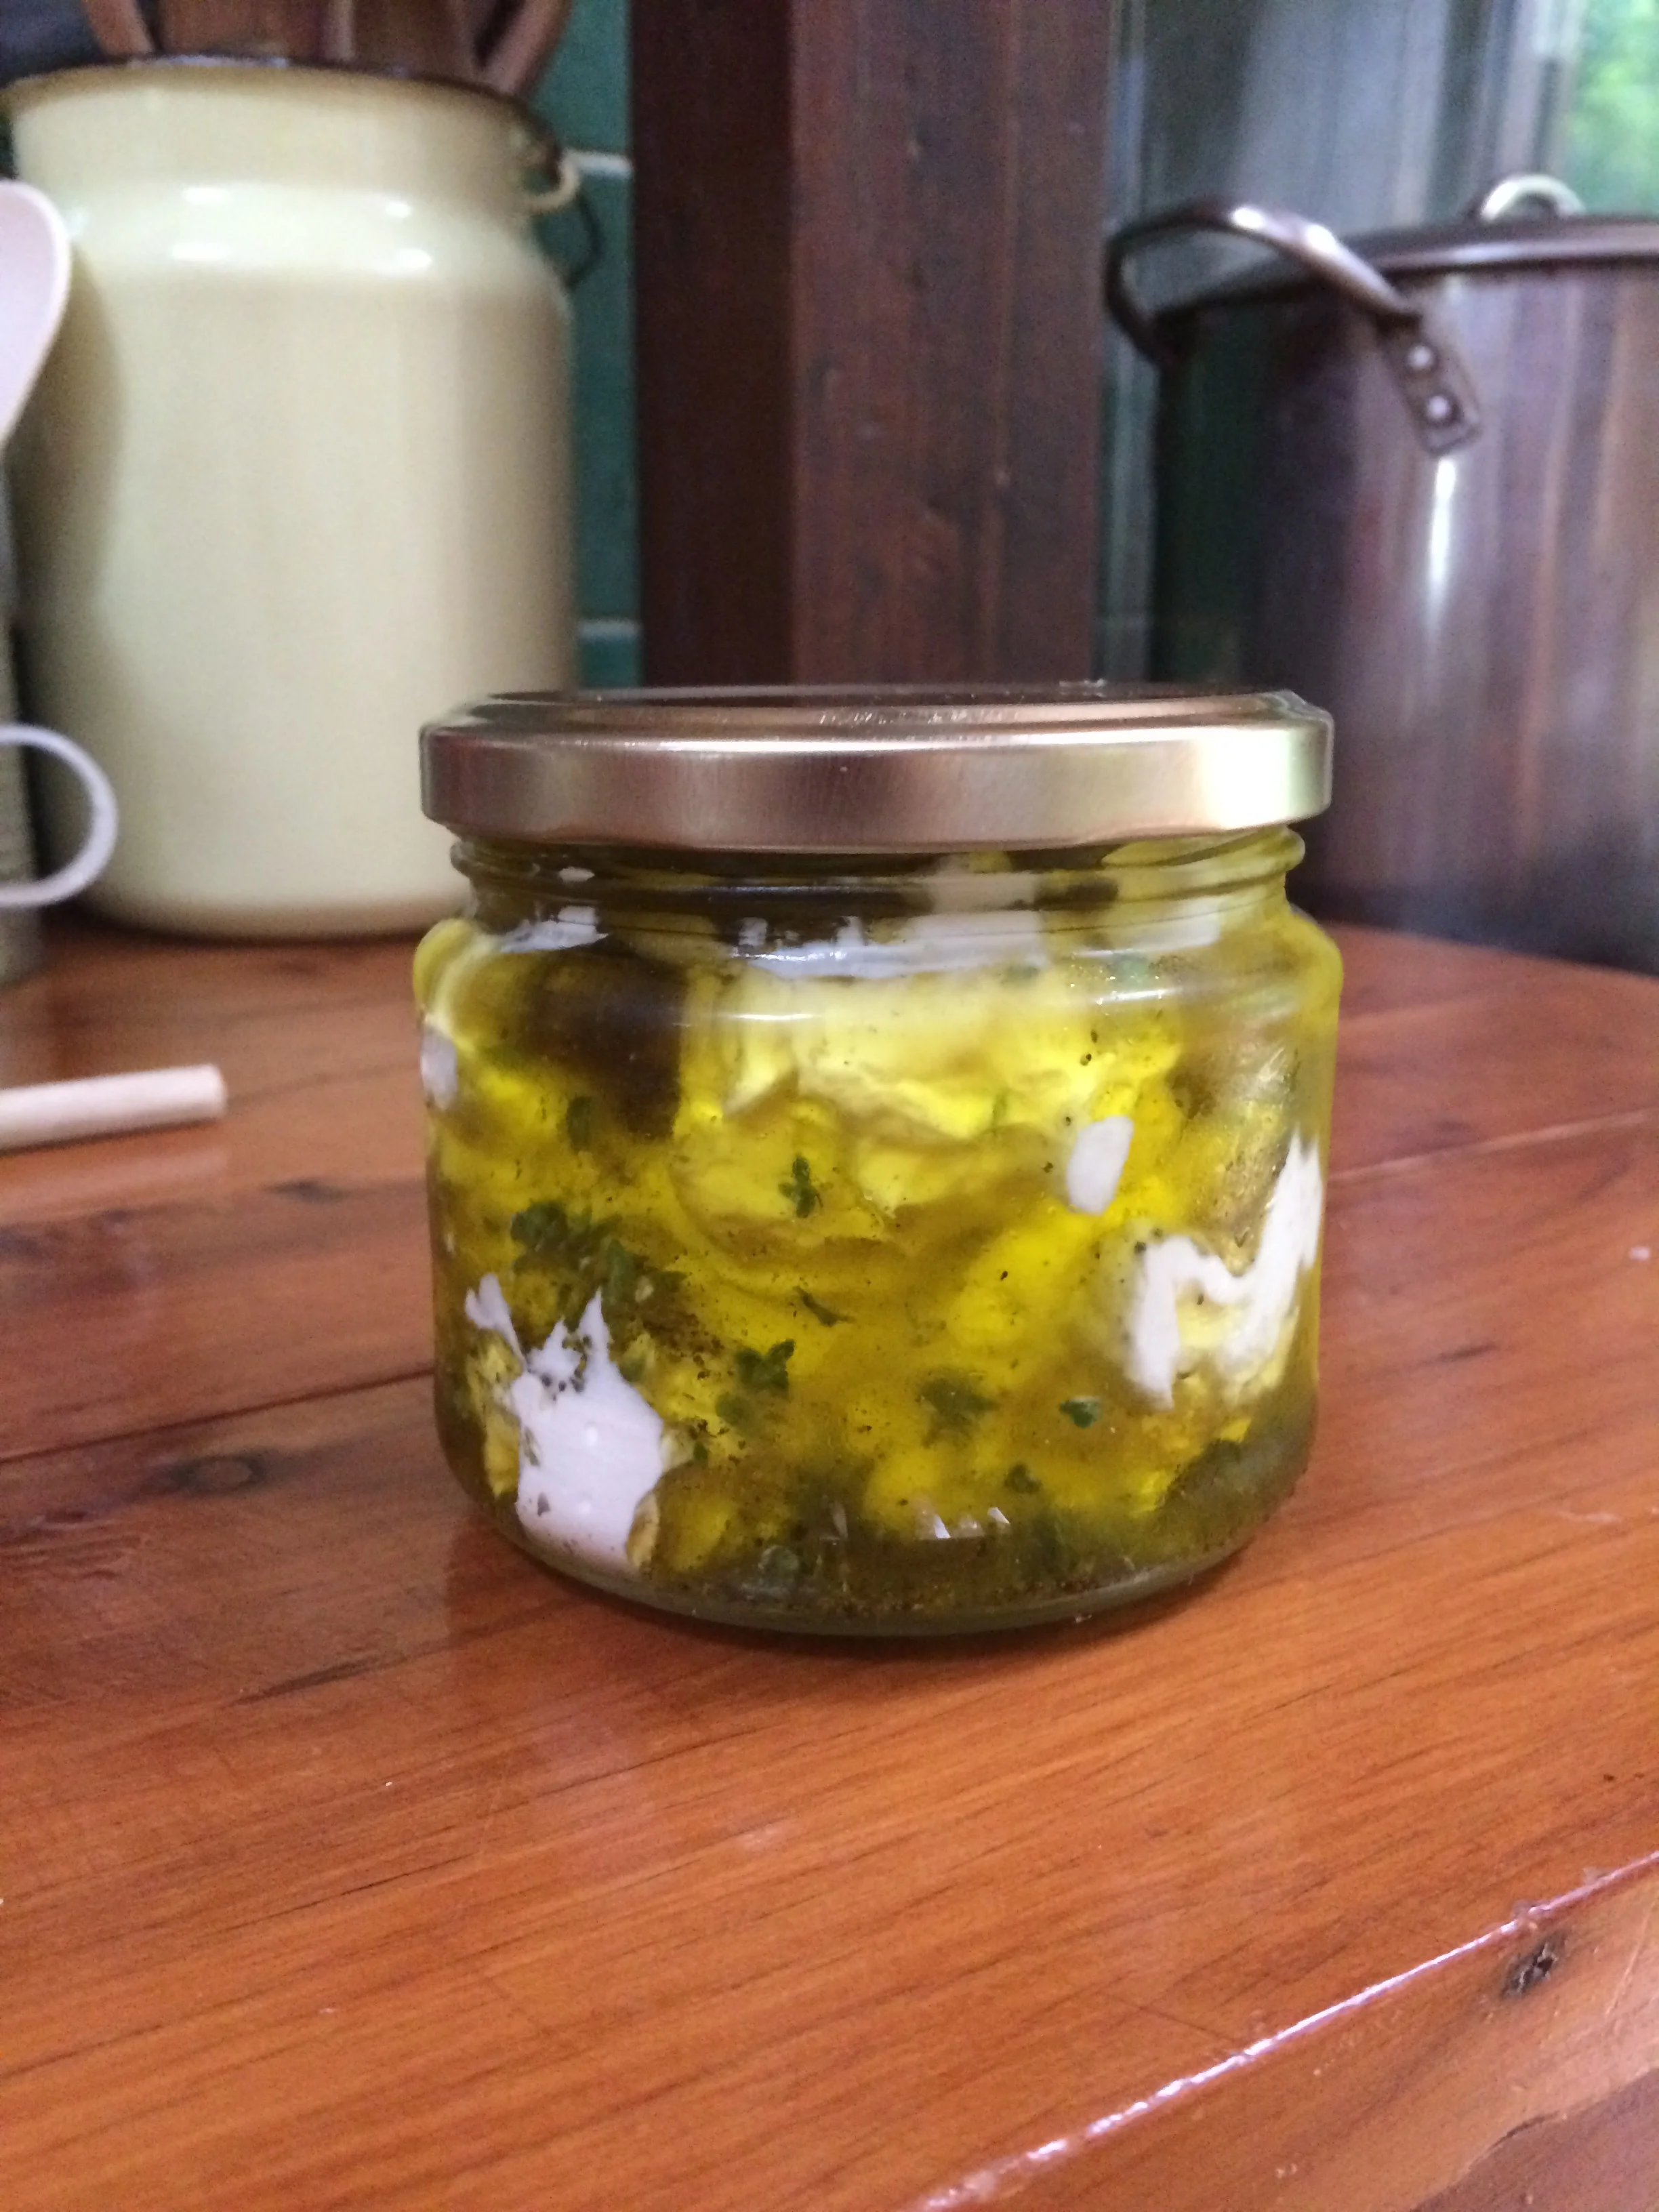
Gently squeeze out any excess liquid; discard liquid in bowl (my chickens and ducks love whey). The yogurt will be thick and resemble soft goat cheese. Roll yogurt into 3/4 inches balls or 1 large one and place into a jar.

Whisk oil, herbs, and lemon zest in a small bowl to combine. Season with salt and pepper. Pour over yogurt in jar. Top up with olive oil if needed and seal jar with lid. Place in fridge and allow to marinate for at least 8 hours and up to 2 weeks before eating.

                                                     My favourite way to eat Labneh

                                                     My favourite way to eat Labneh

Plantain

PLANTAIN

 Narrow leaf (plantago lanceolata) 

 Narrow leaf (plantago lanceolata) 

According to the Luna Calendar, last Sunday (28th March) was a good day for pruning so I decided to tackle a neighbour’s hedge that was overhanging part of my medicinal herb garden. Little did I know that I was also pruning the home to some Native Paper Wasps who understandably took offence to having their home dismantled. So I inevitably ended up with a very painful sting to the side of my neck that hurt like crazy and immediately became swollen, hot and red. So what to do… 

I quickly grabbed a leaf of Plantain from my garden, scrunched it up with my fingers to release the juice and gently rubbed the affected area. The powerful antihistamine and anti-inflammatory Plantain juice gave immediate soothing relief. The redness and pain just disappeared and I was able to get on with the job in hand, avoiding and respecting the wasp’s home of course and in complete awe of the power of this incredible healing plant. By the time my husband came home ten minutes or so later, all that could be                                                                          seen for my ordeal were bits of green herb dangling from my neck!

Broad Leaf (plantago major) 

Broad Leaf (plantago major) 

Plantain is both classified as a weed and revered as a very important healing herb throughout history. Both Broad and Narrow Leaf Plantain have similar healing properties.  Its leaves are easily identified, being long (narrow leaf) or rounded and wide (broad leaf) with distinct ribs that run parallel to the leaf. There’s a very high probability of it growing in your lawn and unattended areas of the garden. It grows in just about any soil conditions and most likely found growing at the edges of driveways, in the cracks of concrete and along pathways. Plantain is very easy to harvest and grows all year round and is always there to pick when you need it.

 Used for thousands of years this trusted and healing herb is nature’s answer to antiseptic cream 

Its natural antibacterial and anti-inflammatory properties quickly reduce skin inflammation and pain (as I can vouch for) and has a powerful antihistamine effect. Great for healing wounds, insect and snake bites, and as a remedy for rashes, eczema and cuts. Simply scrunch up a leaf or two, or put in your mouth and chew it slightly to release the juices. I also make it into a very powerful yet gentle healing ointment (recipe below) to use as a natural antibiotic ointment on cuts, bites, rashes and stings

Plantain is also a great purifier used for generations to draw out splinters, dirt and puss, infection from wounds, blood poisoning and gangrene.

For any cuts, stings, bites, splinters etc, simply chew or scrunch a plantain leaf to release the healing juices, place over the injured area and cover with a band aid or bandage. 

The young leaves can been eaten as a green in salads and stir fries etc and has a slight bitter taste due to its tannin content.

The seeds can be eaten raw or cooked and are a good source of Vitamin B1 and can be milled or ground into meal to make bread. The seed husks swell up making them a good source of dietary fibre. 

Always wash well! Depending on where I collect my herbs, I like to wash under cold water to get rid of the dust and dirt, then I often add 1/4-1/2 cup of Apple Cider Vinegar to the water, swish around and let it sit for 5 to 10 minutes. Rinse and its ready to go.

If harvesting it yourself, make sure to pick from an area that has not been sprayed with any chemicals or pesticides and that you have correctly identified the plant before consuming


How to make a Plantain Succus, Tincture, Tea and Ointment...


TEA

Add a few chopped leaves to a cup or teapot, cover with boiling water and steep for 5-10 minutes. Add some raw honey for an added antibiotic boost and drink several times a day. 

When taken internally this is said to help with hay-fever, indigestion, heartburn and ulcers, coughs and colds. The tea can also be cooled and used externally on the skin for inflammation etc.

PLANTAIN SUCCUS...

So simple to make my 7 year old grandson Blaise made this for himself.

You will need - 

Equal parts plantain leaf juice and raw honey. 

3-6 drops of Peppermint oil (try 2 or 3 drops first and go from there)

Mix thoroughly and put into sterilised jars and keep in fridge. 

Dosage - 1tsp x 3 daily for dry coughs, hay fever and digestive problems including Irritable Bowel Syndrome and stomach ulcers. It can also be applied to skin externally for skin wounds and problems mentioned above.                            

   PLANTAIN TINCTURE

Alcohol based tincture - Is the most commonly used tincture. The benefits of an alcohol based tincture is that the alcohol easily and completely extracts the beneficial healing properties of the plant used. The body rapidly assimilates alcohol tinctures enabling the effects to be quickly felt and its also an excellent preservative, maintaining the integrity of the herbal tincture for many years. 

Half fill a wide mouthed glass jar with washed and chopped fresh Plantain Leaf and cover with 100% proof vodka

or

Alcohol free tincture - can be used for children and anyone who is unable to have alcohol

Half fill a wide mouthed glass jar with washed and chopped fresh Plantain Leaf. Cover with 125ml Glycerine and 375 ml Apple Cider Vinegar.

Put lid on jar and gently shake. Label with the name of herb and date made and place out of direct  sunlight for 4-6 weeks

Shake gently every day or so.

When ready, use muslin or nut milk bag to squeeze out tincture discarding left over herbs into compost. The juice left is your tincture.

Label with date and name of herb and decant into clean, dry, dark bottles and store in a dark place. 

Alcohol tinctures will last for many years if stored correctly and non-alcohol tinctures will last for 1-2 years.

This is a concentrated tincture, so take small amounts only.  

Dosage - Adults 10-15 drops, children under 12 years 5-10 drops in water or juice x 3 daily.


Plantain Ointment 

125g fresh Plantain leaf, washed and chopped or 60g dried leaf

1 cup Olive oil

1 cup Coconut oil  

50g grated Bee’s Wax

Optional 1 tsp Vit E or Benzoin powder as a preservative

Double Boiler

Wooden spoon

Clean lidded jars

Labels

Milk bag, muslin or similar for straining

Gently melt the olive oil, coconut oil and Benzoin powder if using in a double boiler. The idea of a double boiler is that the steam is used as opposed to the water, so ensure that the water isn’t actually touching the bowl with your herbs. Add the chopped herbs and completely cover with the oil. Don’t worry if it looks as though there won’t be enough oil to cover it. The herb will gradually collapse as it gets warmer making it more oily.  Cover pan with a lid. 


Simmer gently for 2-3 hours stirring occasionally  and keeping your eye on the water levels in the pan so it doesn't dry out.

When time is up, carefully strain the herb mixture into a pyrex jug using the milk bag or muslin. This will be hot so take care!

Compost left over herbs.


Place the jug back into the double boiler and add the grated Bee’s Wax and Vit E if using. Gently heat again until the wax has completely melted.


Quickly pour into the glass jars and cover with baking or kitchen paper until completely cooled.

Lid and label jars with date, name of herb and uses

Best to keep in the fridge and will last for 1-2 years.


So there we have it, precious, wonderful Plantain, truly one of nature’s greatest gifts…


References:

‘How can I use herbs in my daily life?’, 6th Edition, 2013, Isabelle Shipard

The Weed Forager’s Handbook: 2012. A Guide to Edible and Medicinal Weeds in Australia. Adam Grubb and Annie Raser-Rowland


Julie Gundlach has been qualified in many areas of health and wellbeing for over 20 years including Advanced Classical Herbal Medicine, Clinical Aromatherapy and Psychotherapy.

Living Skills Share Page

Living Skills Share Page

We will be using this space to share ideas, thoughts, recipes etc about living sustainably and self sufficiently in our homes,  so please feel free to join us with anything you would like to see, add or say. Email tips, ideas, thoughts, recipes etc to juliegundlach@livingchange.com.au and it will then go up on our 'Living Skills Share Page'.

Don't forget to scroll down to the bottom of the page and click on 'view post' to see our first Living Skills Blog...How to make delicious Chai.

Here's our first share from Kari Scruby

Norwegian Crispbread 

by Kari Scruby

I have been making this crispbread from the recipe link below.  I sometimes add raw blended beetroot or pumpkin to the mix or carraway seeds or any type of herb.   I also use any type of flour... at the moment I've been using the following -

Ingredients:

  • 1 part flour - wheat, rye or whatever you like
  • 2 parts seeds or whole grains of your choice (sunflower, pumpkin or flax seeds + whole wheat berry, steel-cut oats, rye, or quinoa are all good choices)

  • salt to taste

  • 1 part water

Directions:

Norwegian-knekkebrød-crispbread-recipe.jpg
  1. Pre-heat your oven to 180 celsius/350 fahrenheit. Add all ingredients, except the water, to a large mixing bowl. Stir until the mix is fully blended.
  2. Once all of the ingredients are stirred together, add the water — but slowly. This part can be tricky so add half of the water, stir a bit, then add more little by little. You want the final mix to be moist, but not overly wet, or else you'll have to increase the baking time. No biggie, but save yourself the hassle of having to wait and slowly mix in the water.
  3. Place the contents of the bowl on a parchment paper lined baking sheet and spread out the mixture as flat as possible. Use the back of a rubber spatula or metal spoon to help get the knekkebrød as flat as possible.
  4. Score the un-baked knekkebrød with rubber spatula or knife to make breaking it up after baking easier. Next, place the baking tray in the pre-heated oven and allow to bake for an hour.
  5. Take the baking tray out of the oven and allow it to cool until it is easy to handle.

Then break it into pieces, top with your favorite spreads like jam, soft cheese or with ham, salami, peanut butter, or just plain butter, and enjoy!

Here's the link http://offbeathome.com/2014/09/knekkebrod-crispbread-recipe